Have you tried your hand at an email autoresponder series? Though they are being utilized more and more, autoresponders are still only used by about fifty percent of businesses. In a recent podcast on autoresponders with TechnologyAdvice, I provided an explanation on why autoresponders are underutilized – namely lack of time, lack of understanding, and a bit of intimidation.
Yet, if you spend some time planning and creating an autoresponder series that appeals to your subscribers, the automated messages can (and will) give you more time, increase sales, and provide a means of continued communication and brand recognition.
In the easy and fun-to-read autoresponders infographic below, get 7 different ideas on creating a series of your own, including:
-
After someone downloads a resource from your site
-
As an eCourse opt-in
-
An email newsletter for the shamefully busy person
-
Getting old content in front of new eyes
-
Re-engaging existing subscribers with content they want
-
Tips and tricks
-
Showcasing your work, solutions or projects
Click on Autoresponder Infographic
To view it better
Are you a Pinpointe Customer?
Learn how to create an autoresponder series in your Pinpointe account.
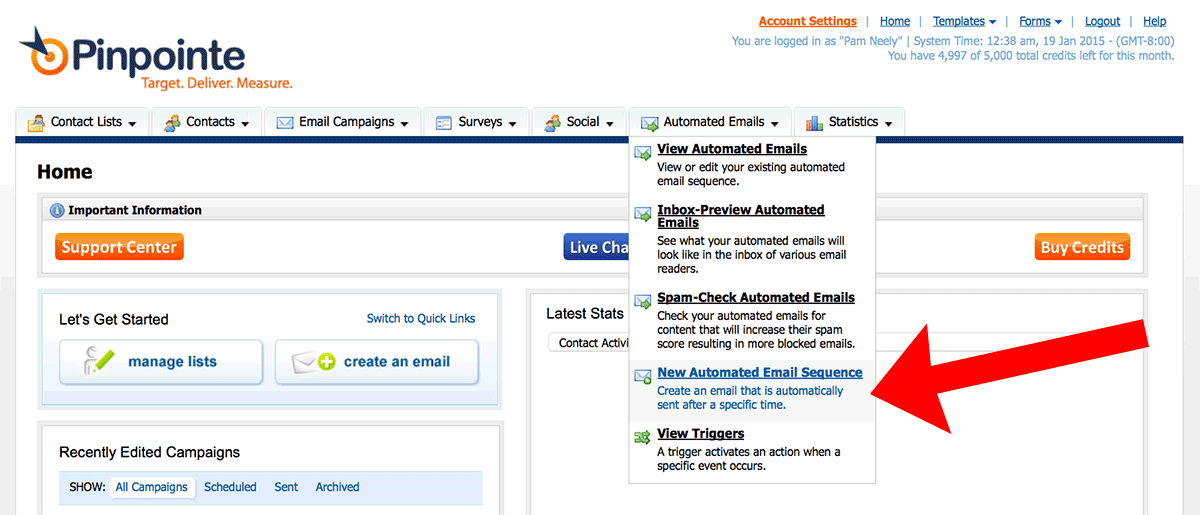
1) Go to the “Automated Emails” tab from your Pinpointe dashboard. Click it, then scroll down to “New Automated Email Sequence”.
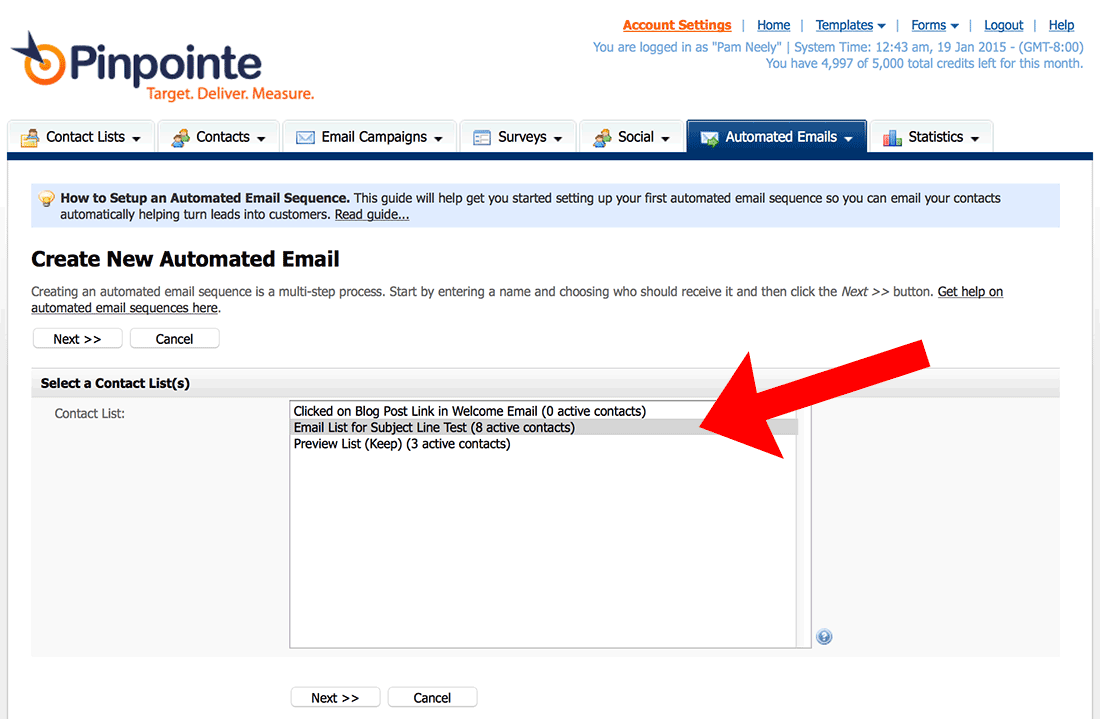
2) Select the list you want to send to, then click the “Next” button.
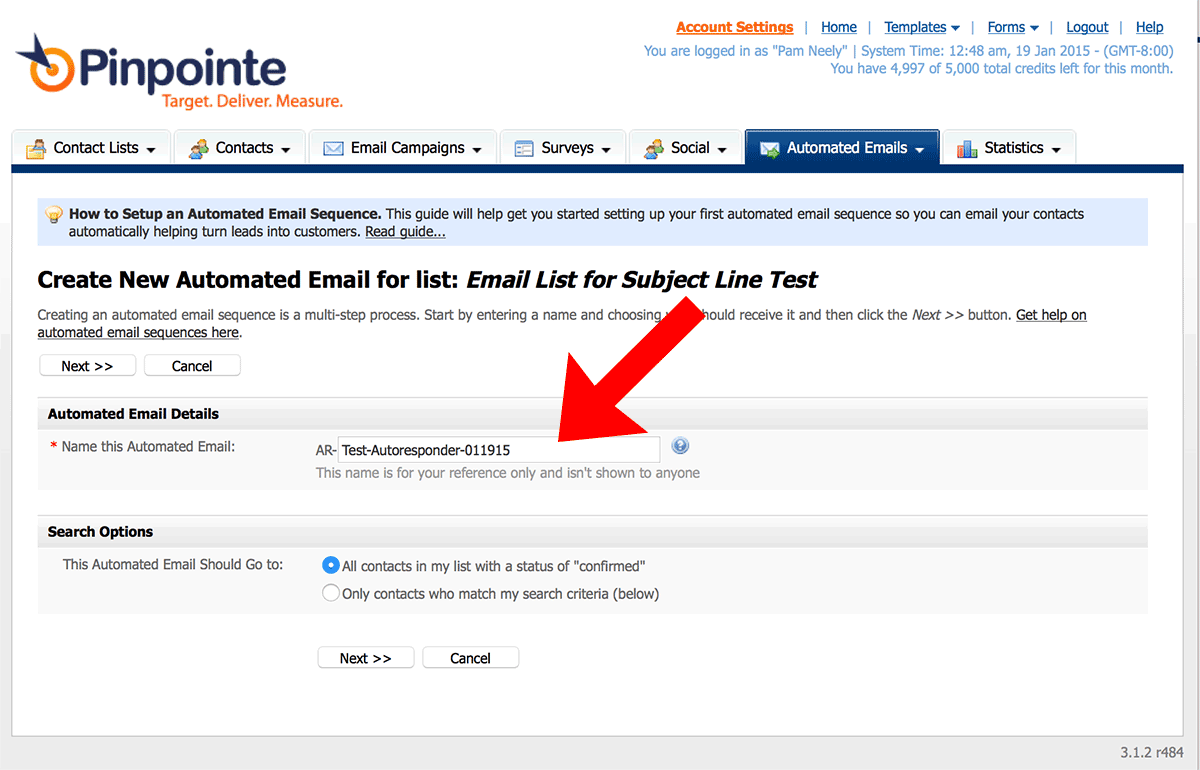
3) Name the autoresponder. Then decide if you want to mail everyone on the list you just selected, or if you want to use some search criteria.
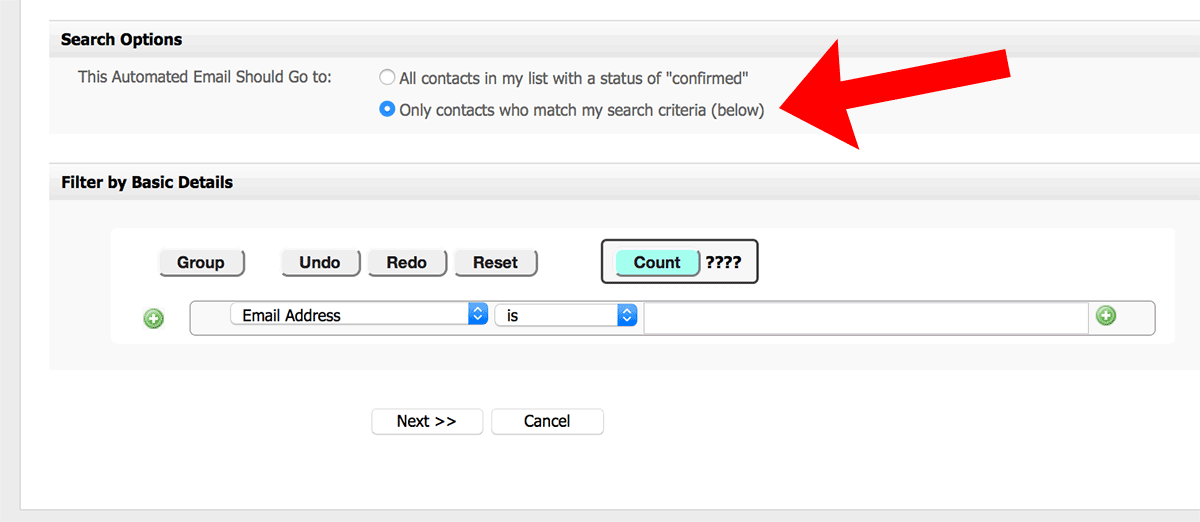
This is what the search criteria interface looks like. It will give you a count of how large your list will be after you’ve applied the search criteria:
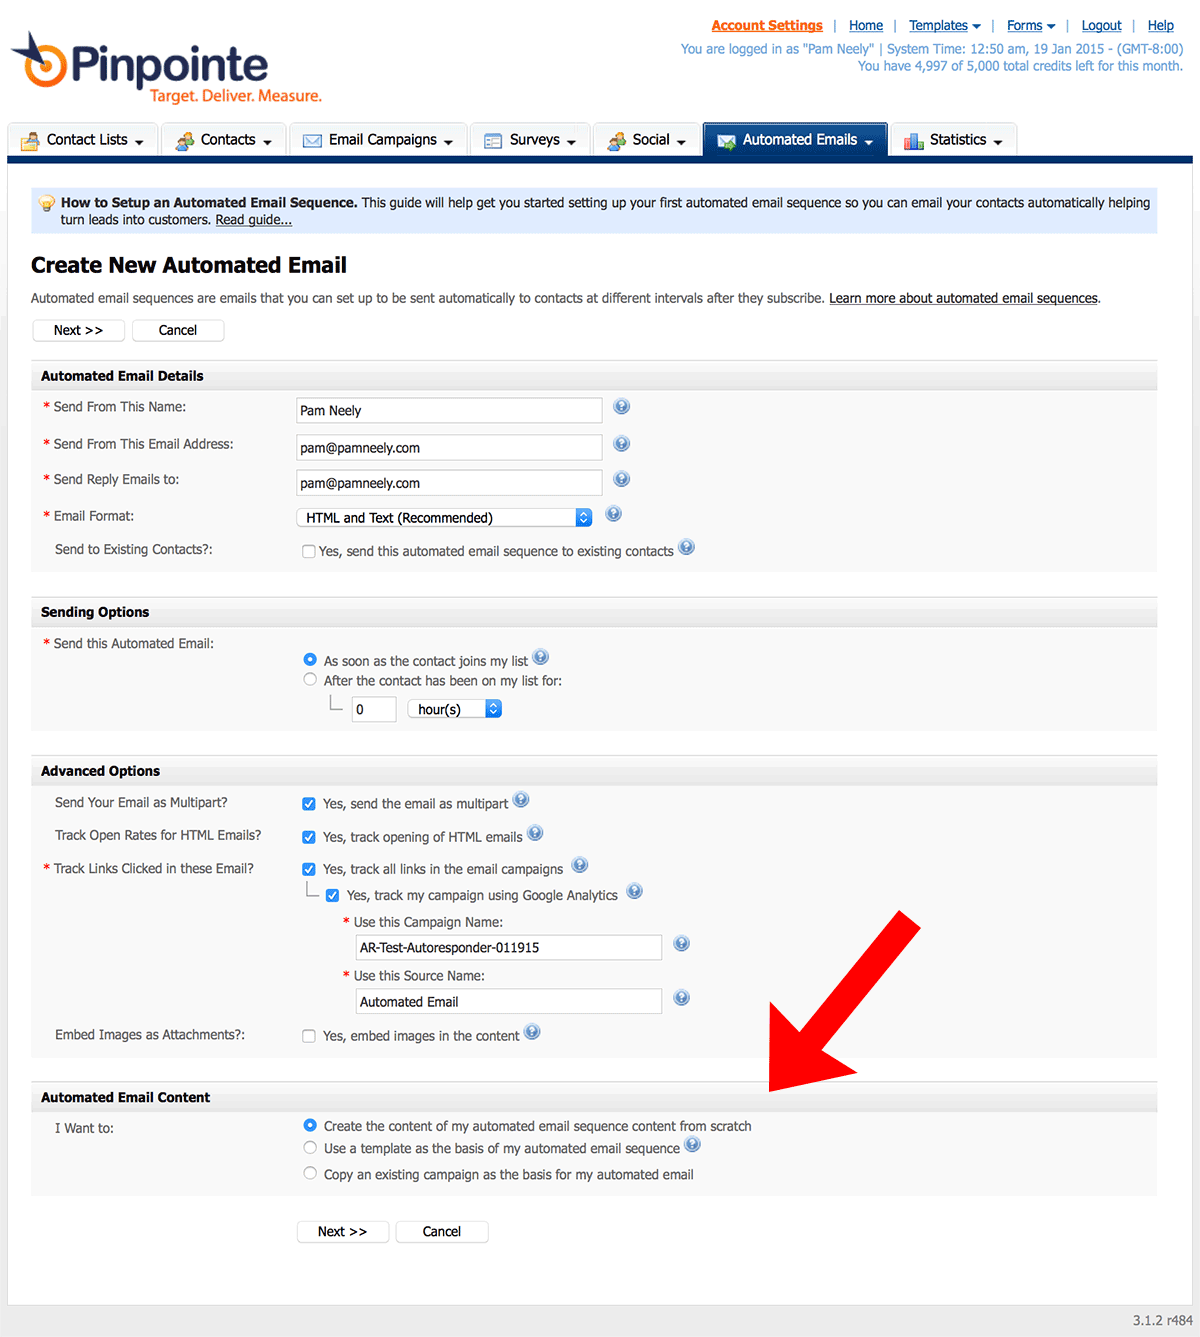
4) This next page is where a lot of the magic happens. The defaults here are probably best left as is unless you’ve got a specific reason to change them. For example, in “Sending Options”: Unless you’ve got a specific reason to do otherwise, send people the first autoresponder immediately after they’ve signed up. You want to engage them at the moment when they are most interested. They may be busy later.
The one exception is the bottom section where you’ll pick from three options:
- Create the content of my automated email sequence content from scratch
- Use a template as the basis of my automated email sequence
- Copy an existing campaign as the basis for my automated email
We recommend using a template for your autoresponders, even if you have to save this page, leave it and go create the template. Templates save hours and hours of time. They also reduce mistakes and rendering problems.
For this example, I’m going to copy my existing Welcome email campaign. I’ll use that as the template for this autoresponder.
I’ll click “Next” to continue.
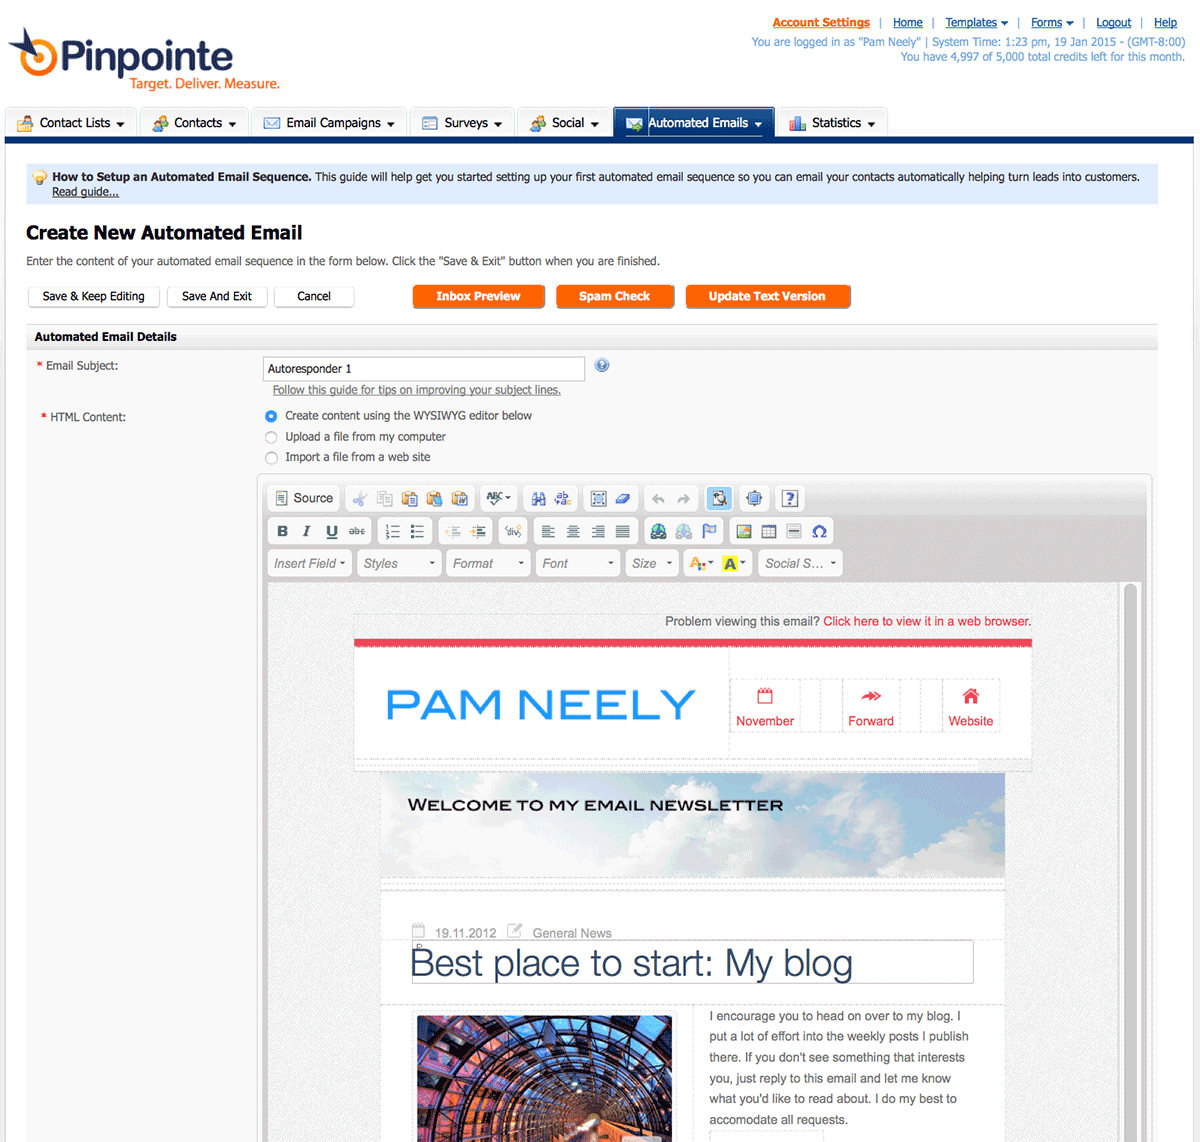
5) I’ll now edit the first autoresponder of the series, just like I would any other email message.
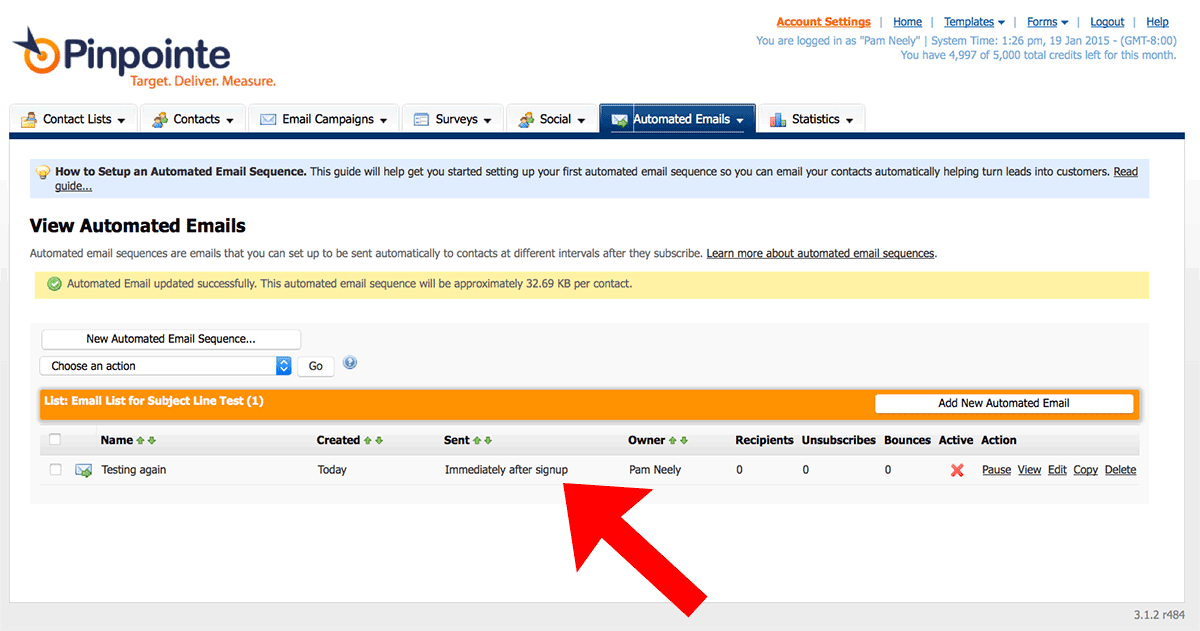
6) This is the next screen. I’ve got one autoresponder queued up:
To add the second one, I’d click “Add New Automated Email”. In the second page of creating the next autoresponder message, under “Sending Options” I’ll define when I want the second autoresponder to go out.
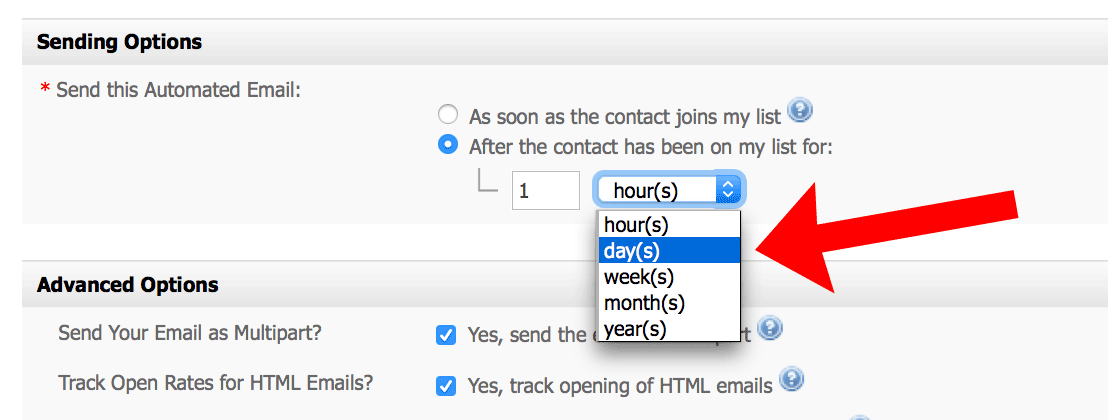
I want it to go out the next day, so I’ll change the pull-down menu to days, and set it to 1. Then I’ll finish this form, edit the email in the next screen, and click “Save and Exit”. That will finish the second email in this autoresponder series.
Want more info on autoresponders – be sure to check out our 20-minute, quick-fire webinar How to Master Autoresponders in 20 Minutes.


